WebCV
The WebCV application was built with ease-of-use in mind and provides the necessary tools for users across campus to update profile photos, contact information, office hours, biographies and more. Each individual profile can be built out to be as in-depth as you desire, and in most cases, it will eliminate the need for a faculty or staff member to maintain their own website.
Please use the guides on this page to guide you through the ins and outs of WebCV.
Change Profile Information Using WebCV
WebCV, formerly Factools, is a UWG application that enables faculty and staff to update their UWG Profile Page information. Everything displayed on an individual profile page is done through the WebCV application. These items include:
- Your basic contact information (phone number, email address, social media, and office hours)
- Your curriculum vitae
- A biography about yourself
- Your UWG profile picture
- Degrees you have earned
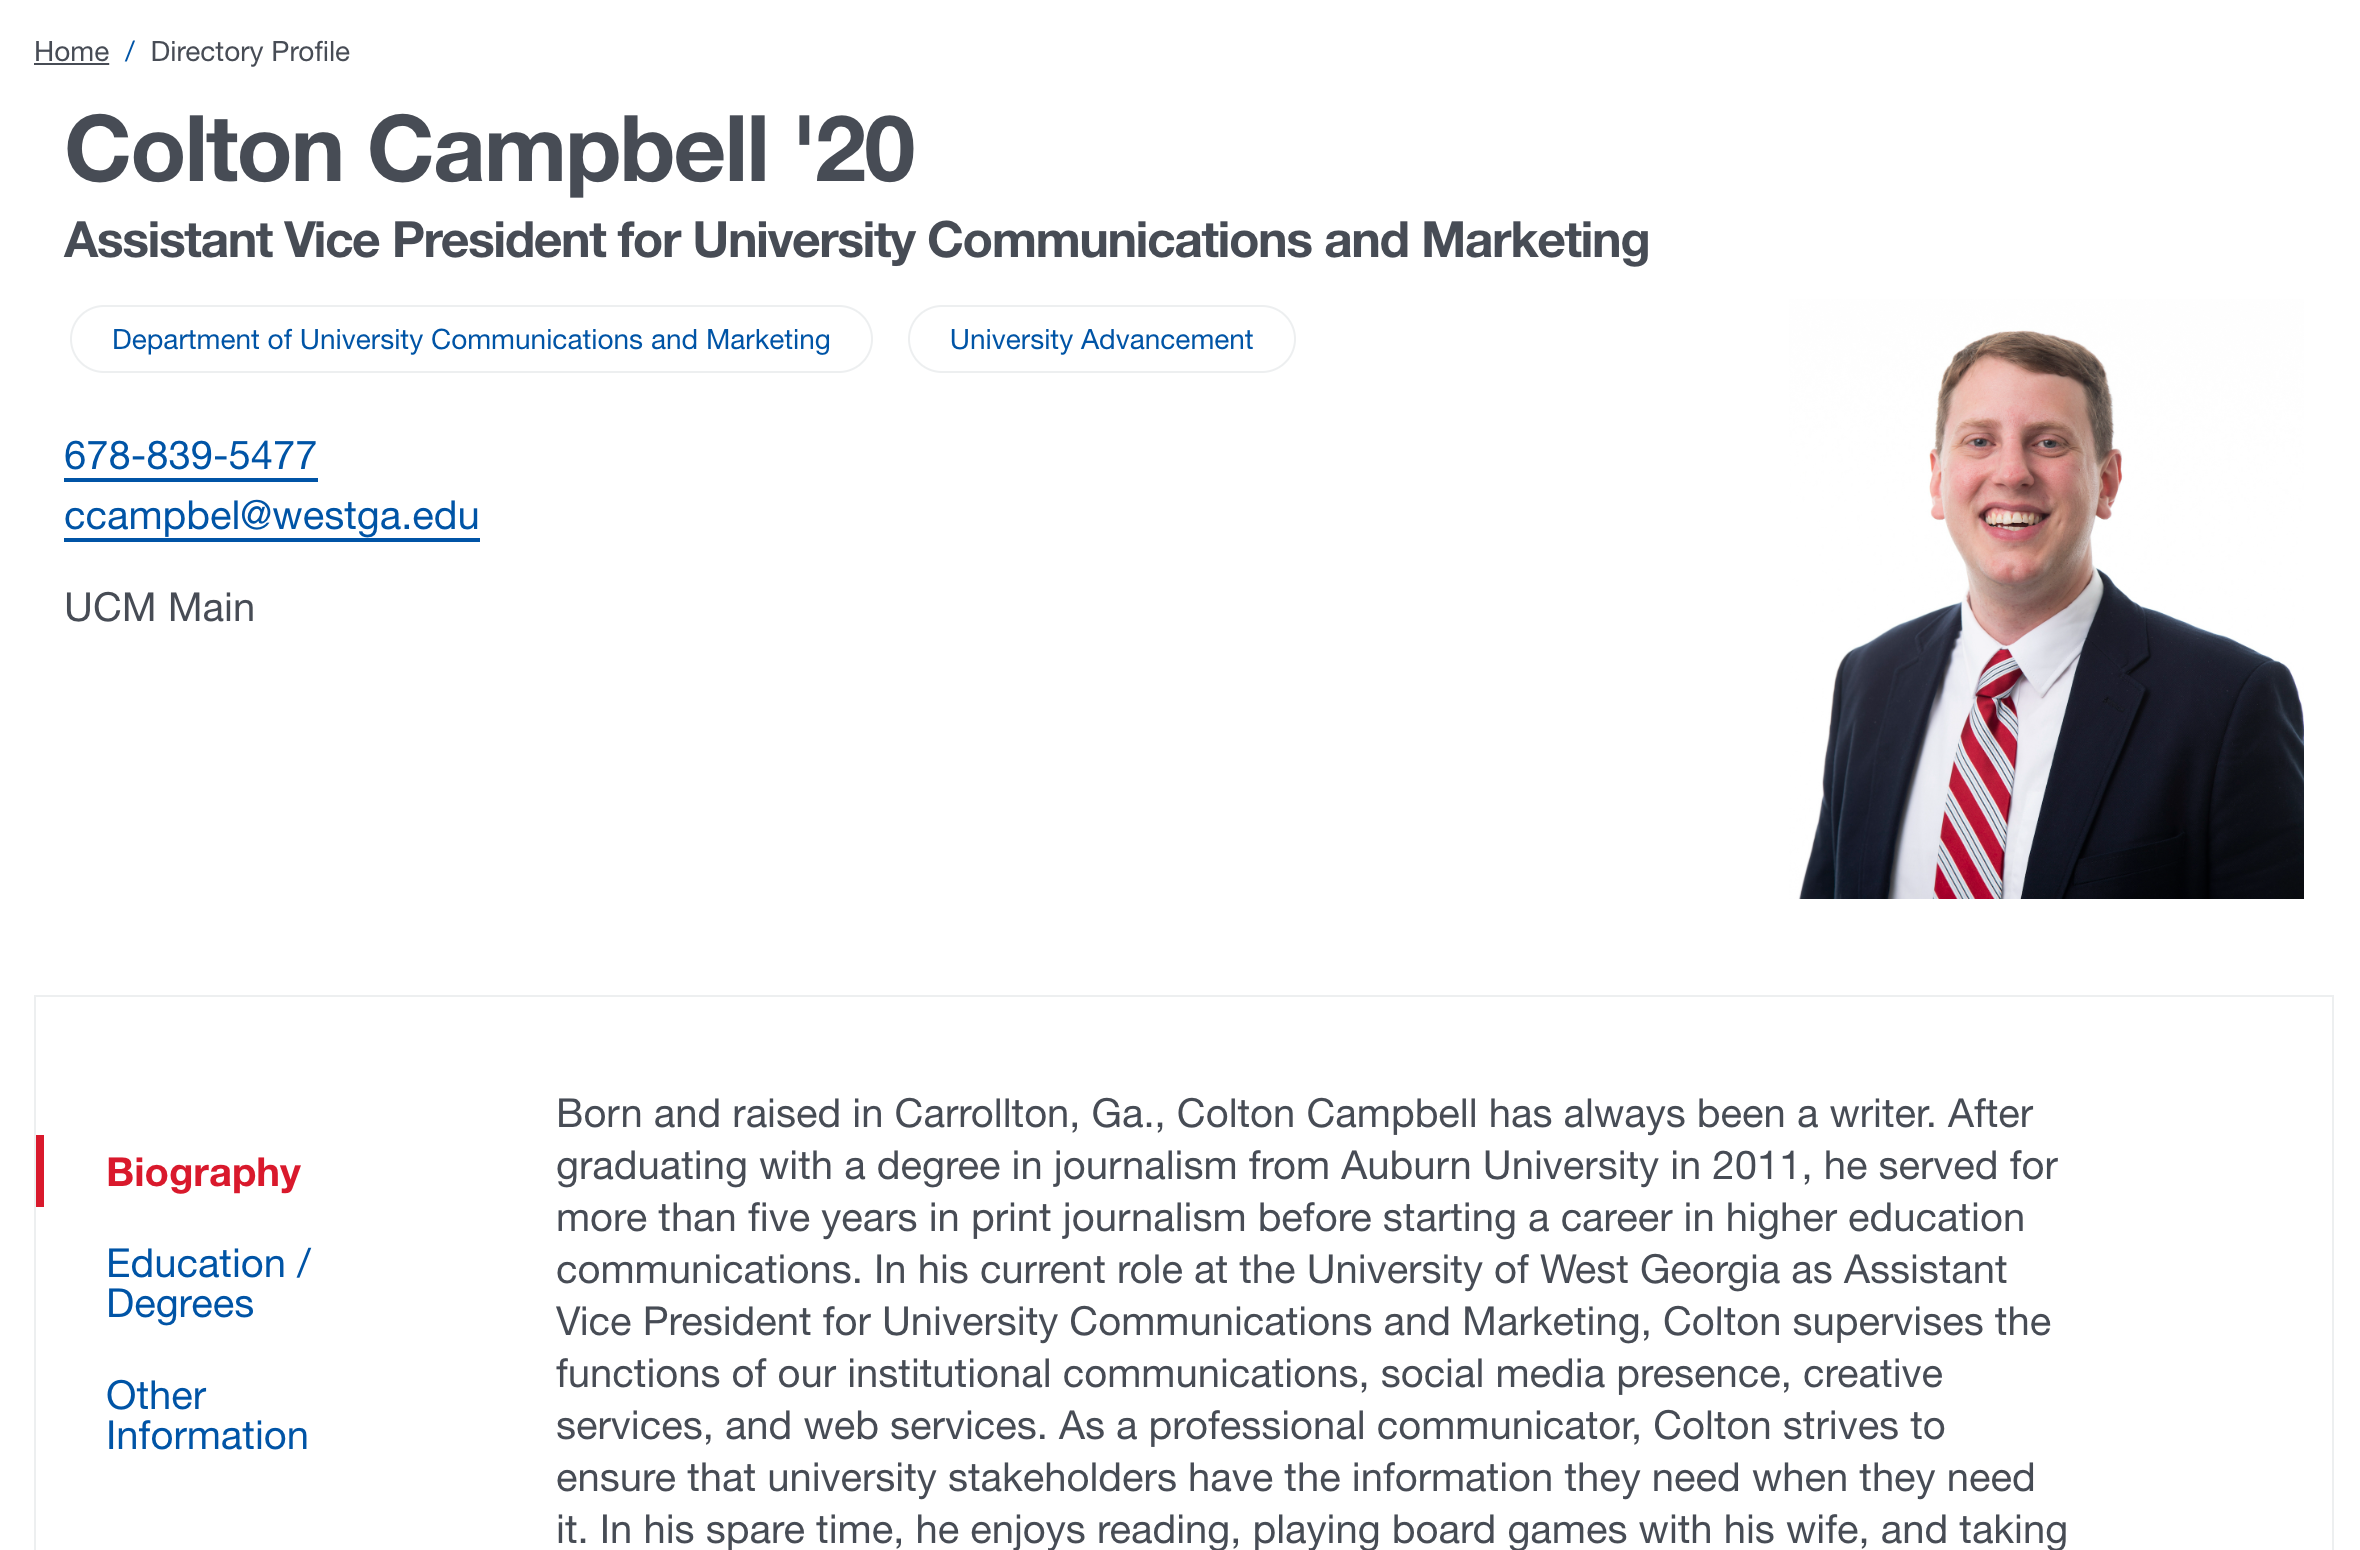
The below image is a prime example of a completely filled out profile. We highly encourage all UWG faculty and staff to be as thorough when filling out their profile page and have provided tutorials to make the process any easy one.
Logging into WebCV is quite simple. All you need to do is find one of the many WebCV links throughout the UWG website. It can be found in three different places:
- By doing a search for "WebCV"
- Clicking on the red WebCV Login button at the top of this page
- Clicking on the last link under Application Portals on the Faculty and Staff page
Once you click on the WebCV link, you will be presented with a login page, which looks like the below screenshot. Please use your standard UWG User ID, without the addition of @westga.edu, and password to log in.
If you cannot not log into WebCV, please contact ITS by submitting a request for assistance at help.westga.edu.
This section of WebCV is used for creating and maintaining employee administrative information. It is divided into two major areas: Contact Information and Organizational Information.
Please note that updates to Organizational Information are only done by departmental admins. If you are a departmental admin and need to update information for all department members, please use the information farther below, Requesting Access for Editing Entire Departments (Administrative Assistants Only), as your guide.
- To update your employee directory, hover your mouse over myInfo in the top left corner of the WebCV application and click on myDirectory.

2. Update and/or edit the fields in the Contact Information area.

3. Once done updating, click Submit in the bottom right corner.
This section of WebCV allows you to update your profile photo, curriculum vitae, and social media links. If you or someone in your department is in need of a new profile photo, fill out the Request for UCM Services form.
Professional Profile: Used to enter profile information to be displayed on a profile page.
Profile Photo: Used to upload the profile picture that is displayed on the employee’s profile page. It is recommended that image editing software be used prior to uploading for best results. Please see the WebCV Profile Photo guide for assistance.
Curriculum Vitae: Used to upload faculty or staff curriculum vitae. This document can be in PDF or Microsoft Word format; however, PDFs are recommended because they are locked for editing.
Social Media Links: Used to add any (or all) of the four social media types listed on this screen. When a social media address (link) is added in the appropriate field, a corresponding icon is populated on that person’s profile page.
- To update your bio information, hover your mouse over myInfo in the top left corner of the WebCV application and click on myBio.
![]()
2. Update/edit the desired section.
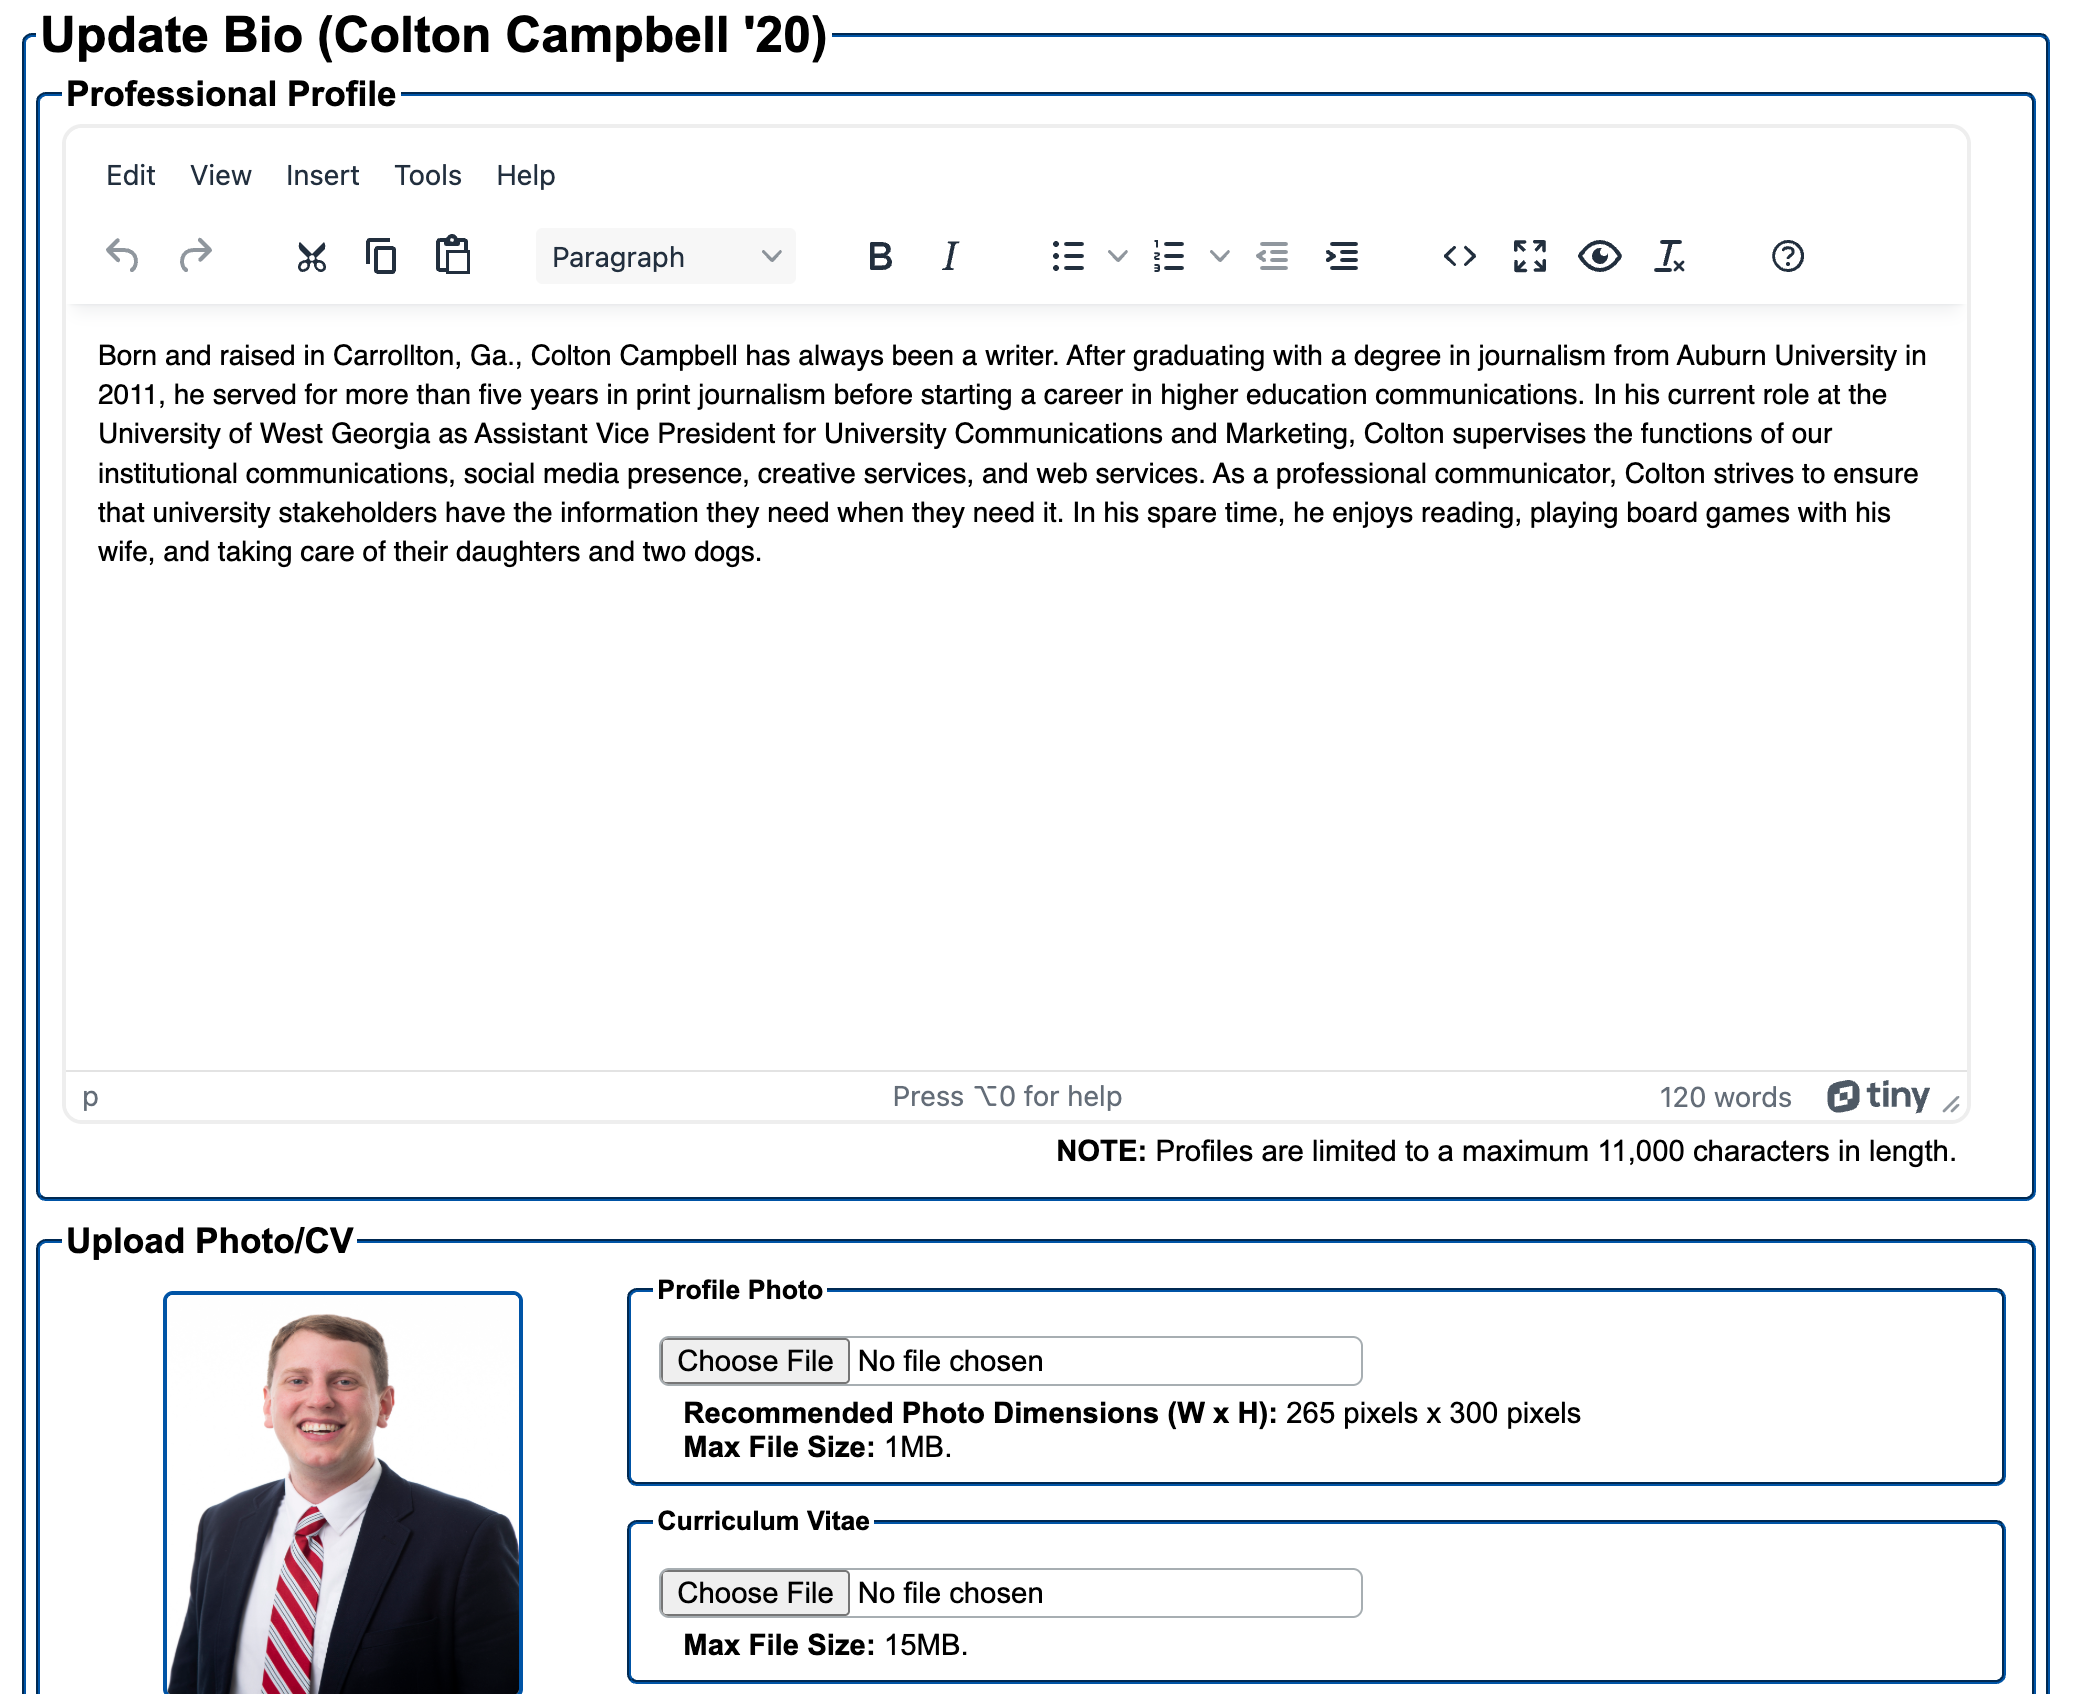
3. Click Submit in the bottom right corner of the screen.
This section of WebCV allows the user to add their degree information to the campus profile. You can add the name, level, school, graduation year, and whether your degree is active or inactive.
- To update your degree information, hover your mouse over myInfo in the top left corner of the WebCV application and click on myDegrees.
![]()
2. To add a degree, click on Add Degree in the top left of the screen. To edit a preexisting degree, click Edit Degree in the top left.
3. Add/edit this section and click Submit in the bottom right corner when done.
If you are a departmental administrator and wish to edit your entire department's profile information, please contact web@westga.edu for this. This is also true for divisional departmental assistants wanting to edit profiles within their division. Once you have been granted access to your respective department or divisional faculty and staff list, follow the below steps.
- To update all faculty and/or staff members at a divisional or departmental level, hover over Admin and click on All Faculty and Staff.
- You should now see a list of people in your department or division. Click on the Directory, Bio, or Degrees links to make changes. Use the above tutorials to do this. If you click View, you will see how your Profile looks on the website.
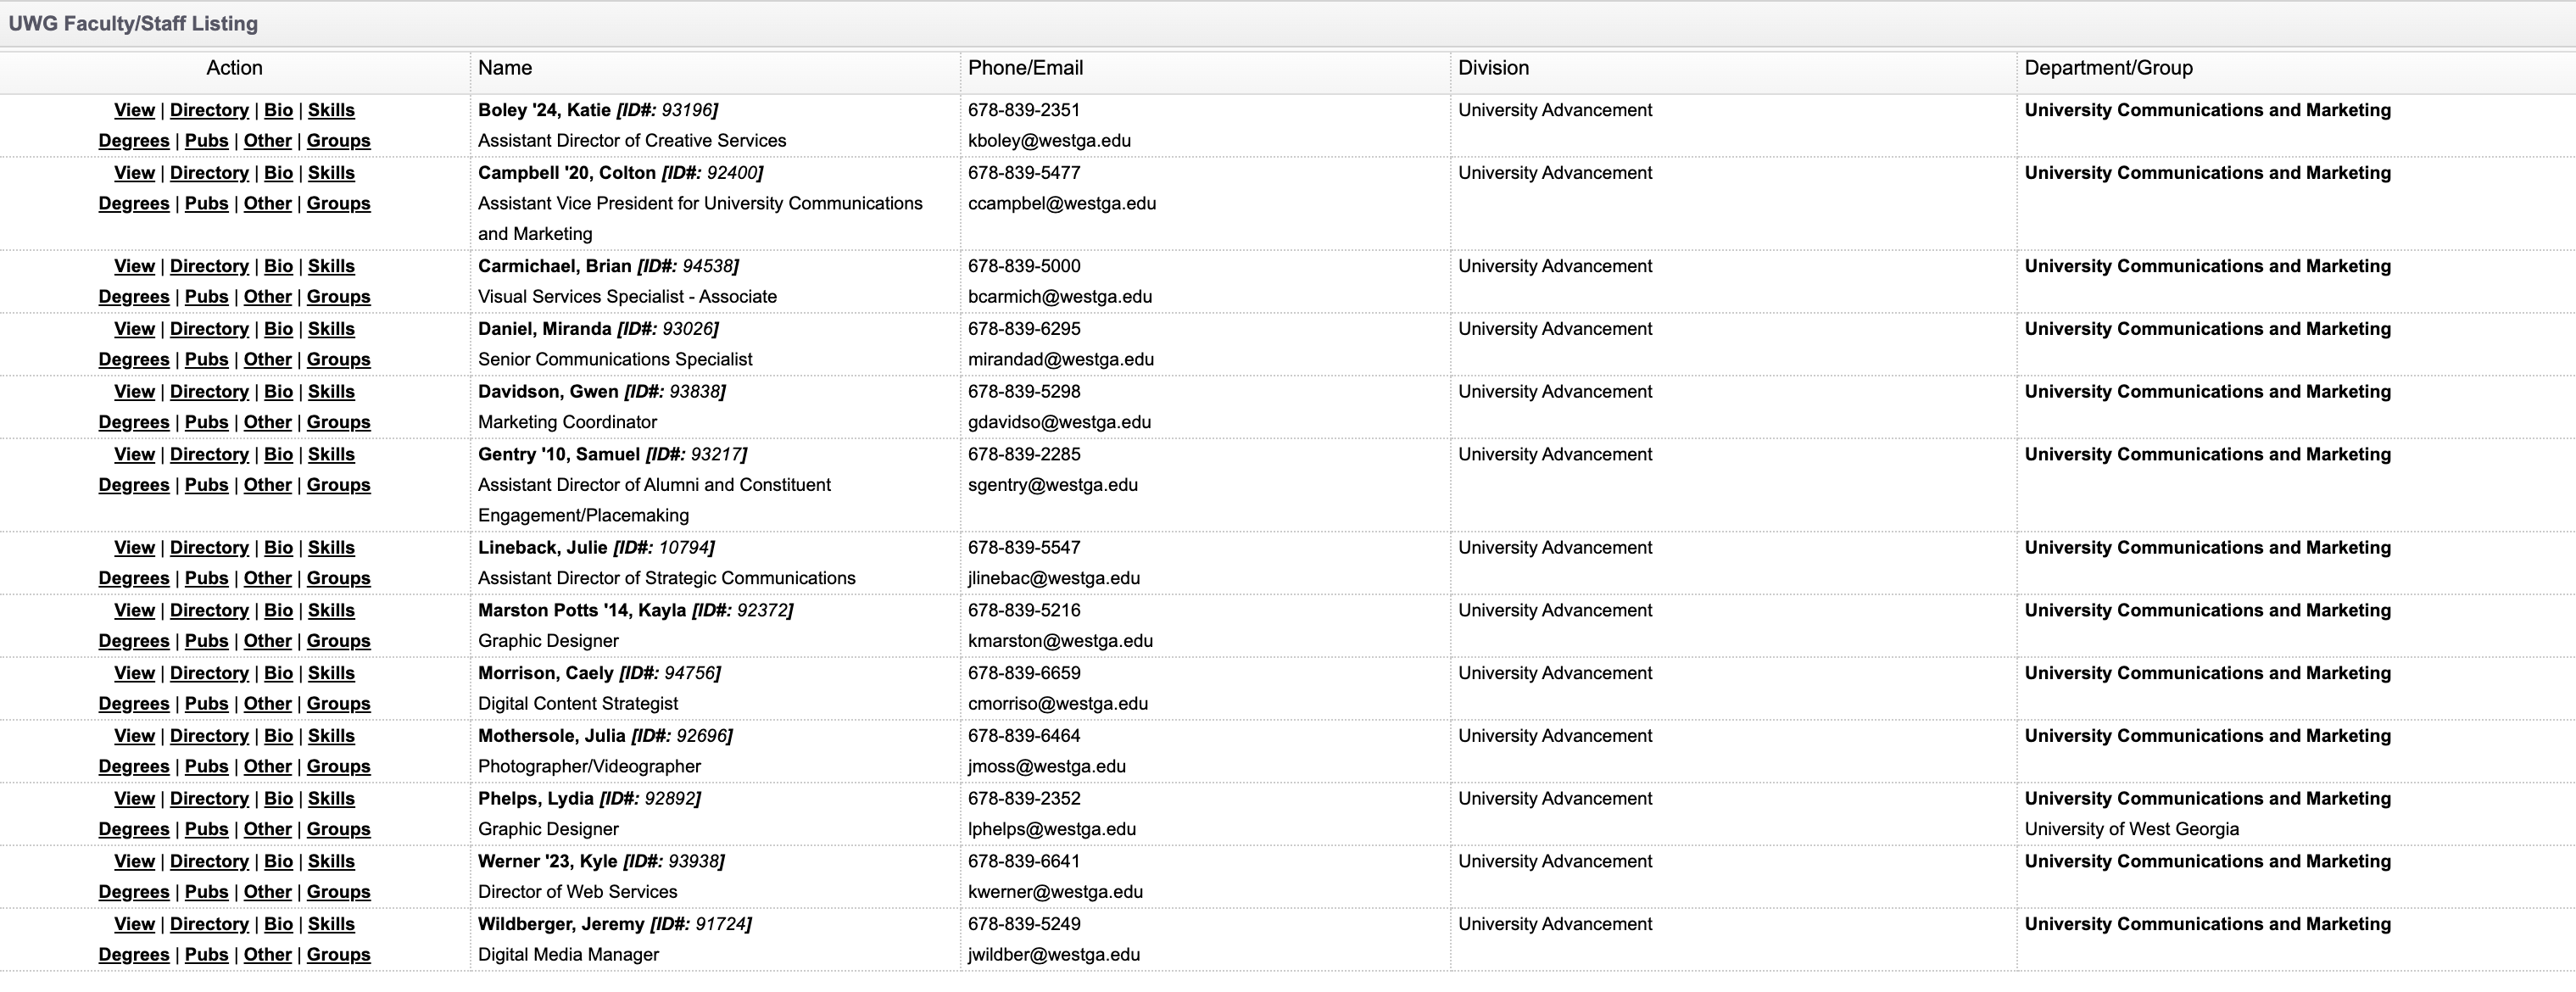
3. Once you hit submit to make a change to one of your Profile options (Directory, Bio, or Degrees) and wish to return to the departmental or divisional faculty/staff listing, click Return to Employee Listing in the middle of the webpage.
The mySkills section of webCV allows any UWG Faculty/Staff member to update details about themselves in the provided sections, like Economic Development, Media and Press, Research and Sponsored Programs, and Undergraduate Research. This expertise information will be housed in one central location for the University to pull from whenever an expert on a particular topic or skill is needed. For more details, visit the Expertise & Resources webpage.
1. To update your skills log into webCV, hover your mouse over myInfo in the top left corner of the webCV application, scroll down to mySkills, and click on it.
2. If you need to add a new skill, click on the Add New Skill button in the top left. If you need to edit an existing skill, click on the Edit Skill button to the left of your existing skill. Please note that you can have multiple skills.
3. Add a skill to the Skill or Topic field. This is where you any skills or topics that you specialize in.
4. Add keywords to the Skill or Topic Keyword field. Adding keywords helps makes searching for a particular skill easier for your audience to find. The more keywords you add, the more likely it is your skill will be found by someone. Make sure to keep your keywords relevant to your skill or topic.
5. The Status field allows you to deactivate a particular skill if you no longer wish to display it. To deactivate it, click on the field, and click Inactive.
6. In the Skill or Topic Description field, add a description of your expertise. If you have a web link for your skill or topic, add it to the External Link to Skill or Topic Description field.
7. The Topic Representation section covers how you would like to discuss your knowledge of your particular skill or topic. The first box asks, Are you willing to speak with the press about your research topics or areas of expertise? Click either “yes” or “no.”
8. Participation Types covers how you would like to present your skill or topic. You can click as many options as you’d like.
9. Media Types covers what digital format you would like your skill or topic to be in. You can click as many options as you’d like.
10. Places covers where you would like to speak about your particular topic or skill. You can click as many options as you’d like.
11. Regional Availability covers where you would like to speak, much like Places but on a much larger scale. You can click as many options as you’d like.
12. The next section, Where do you want this information listed?, lets you choose between listing your skill or topic on your faculty/staff profile page, on the Expertise & Resources webpage, both pages, or not having it listed publicly at all.
13. Once you have everything filled out, hit Submit on the bottom right of the page.
14. Once your skill or topic has been submitted. A member from University Communications & Marketing department will review and approve your submission before publishing it.
15. Once published, you can view your skill or topic on the Expertise & Resources webpage in the mySkills section of webCV, by clicking the Main Page under the Skills Listing section of mySkills.
16. Click on Show Live Site.
17. From here, you can find your skill or topic, if you made it public, by typing a keyword in the search box.